A little too low…

Said no one ever…

But in all seriousness, I finally got the car together enough to drive it around the city. Needless to say? Front end is too low! I love the rideheight, but the subframe is just smacking the ground on almost any little dip, and at that rate the oil pan won’t last long. I’ll raise the rideheight and upgrade to some stiffer Swift springs I think.

Not many parts have come in except for some wiring stuff and a Chasebays clutch line. Hopefully they hurry up and get my power steering kit back in stock so I can get that going! Having no power steering blows – I’m a sucker for working PS haha.

Here’s just a few pics I snapped while on the road. 

Drove the racecar to my first job:

Image


And it made it 20 miles north to my second job:

Image

And a few more:

Image

Image

aaaand… **drumroll please**

MY SON WAS BORN! He came in on May 7th, and he’s perfect. It’s been a stressful 3 days so far with no sleep, but I love being a dad. My lady is one tough girl..I seriously couldn’t do what she has done the last few days. 

Anywho, more progress to come. Just waiting for parts!

S13/S14 mashup!

Small update, but my buddy finally got his S14 painted! 

Remember this car?

Image

He stopped by yesterday with it looking like this now. The painter was with him, and he said he’d love to paint mine as well. So we discussed a few things and I’m pretty sure I’ll be taking my car to him to get sprayed when the time comes.

Image

Image

It came out great. Lots of wetsanding and buffing to come though. The color is a basic white with a green/silver pearl additive. I can’t wait to see the outcome in actual sunlight!


And one of both the cars for good measure.

Image

More wiring!

Took on another wiring project this weekend, and finally fixed my poor subharness. I got the motor 100% complete, with harness. The main harness was untouched, but for some reason the subharness was bare with barely any shielding, random crimp adapters, and fraying wires. I’m honestly surprised the thing worked! 

Here’s what it looked like when I got it:

Image

I ignored it while I did the swap because I’d get to it later, but I couldn’t keep looking at it. So, with an afternoons worth of work, I de-pinned every connector, cleaned up the wires, replaced the stupid connectors with proper solder, and replaced a few wires and connectors. Thank god for extra harnesses laying around!

Here’s the outcome:

Image

Image

Some of the larger connections I had to use electrical tape because I didn’t have the proper size heat shrink. I ordered in some today, so I’ll replace those soon. 

Once that was done and installed, the car went on it’s maiden voyage after the subframe swap, suspension arm install and slim fan install. Went well, just needs an alignment!

Image

Slim fan install

Just slowly making progress with the bay now. I had slim fans installed before, but once I went from motor to motor I hadn’t ran them in some time. Now that I had a KA with a clutch fan and aluminum radiator, my car never liked getting up to temperature. So, finally got these guys installed. The fans are from Votionspeed.com, and the wire loom and heatshrink are from wirecare.com (for those of you wondering).

I bought a bunch of loom since I was planning on redoing my entire harness this coming winter, but rather than having it sit around, I’ll put it to use. The loom is heat resistant and fire resistant/non fray material so it’s safe for engine bays. I assume it’s about the same stuff Chasebays uses.

No spiffy pics, just crappy cell photos. Here’s a few

Image

Image

Image

Image

Each fan has it’s own ground, then I soldered the power wires together, and ran it into the cabin with an inline fuse for safety. The fans are controlled by a basic two way switch.

This got me stoked for cleaning up my bay wires (which again was supposed to be a winter project), but I want to make some progress now while the weathers nice. So, I ordered up a Chasebays power steering kit, clutch line and new battery cables. I also put in another order for some more loom for other projects, so I’ll have some more writeups done soon.

Thanks for reading!

3 Year Anniversary

Well, I let the date slip from under me until I just realized it last week. I wanted to get something nice for the car since she’s been with me for 3 years now…but instead I just tore her apart haha. But either way, a lot has changed in 3 years. 

I wish I had taken more pictures as soon as I got it, but due to the rice I had it torn apart within the first day of owning it. But here’s a few before and afters.

The day I picked it up:

Image

Image

And now:

Image


Image

This car has given me terrible luck when it comes to giving it attention, and seems to have drained my bank account countless times. I still haven’t even really gotten the chance to let her loose, yet I still love it to death. It won’t be going anywhere any time soon!


Enough of the cheesy stuff, here’s a small update. Finally got my HICAS and ABS 100% removed, all suspension arms and bushings installed! I just need to get around to bleeding the brakes and take it to get an alignment.

Here’s some of the junk I removed. Doesn’t include the ABS module, hicas pump and bay lines.

Image

And the new setup! I should have cleaned up and sprayed the subframe, but eh, maybe some other time. 

Image

Image

Image
(Don’t worry about the missing bolt – I have a replacement. Stock tension rods were seized with the metal bushing, had to cut them out!)

Also got around to replacing my OEM rusty and stripped lug studs with extended ARP studs. Much better! This also allows me to run more negative camber and a slightly larger spacer up front for maximum retardness.

Image

The last thing I’m waiting for is my Chasebays power steering line/reservoir kit. Should be here this week, if not next! Then I’ll have power steering again, to the front wheels only. Wooh!

Thanks for reading

Get out of here ABS & HICAS!

So finally I’ve got all the parts necessary for my HICAS and ABS delete. These parts include:

Non-HICAS complete S13 subframe
Energy Suspension subframe bushings & collars
Godspeed V2 Toe Arms
Godspeed V2 Traction Rods (I know, Godspeed…but they’ll do the job for now!)
Dmax RUCA’s
Ichiba extended studs (F & R)
OEM Nissan non-ABS booster
OEM Nissan non-ABS MC
Brand new OEM Nissan MC reservoir & cap
OEM non-ABS brake lines and fittings

We got around to getting the Non-HICAS subframe completely stripped and ready to get the bushings burned out, but then my torch died. Guess that’s what I get for getting a crappy one. We’re taking it to my buddies shop later this week to get them burnt out!

In the mean time, we got rid of all my ABS crap and installed my non-ABS lines, booster and MC. Cleared up so much space, I’m excited for the outcome! We also removed all the HICAS lines and what not from underneath the car. Needless to say…I will never buy another car with HICAS :l

Unfortunately I lacked on pictures since I was in full work mode, but here’s one I snagged

Image

Before I tore it apart I had to drive it around one more time and snag some pics. I absolutely love driving this thing…I can’t wait until it has all these new parts and suspension arms installed!

ImageImageImageImageImageImage

That’s all for now! I’ll have another update once the subframe swap is complete.

Crunch time

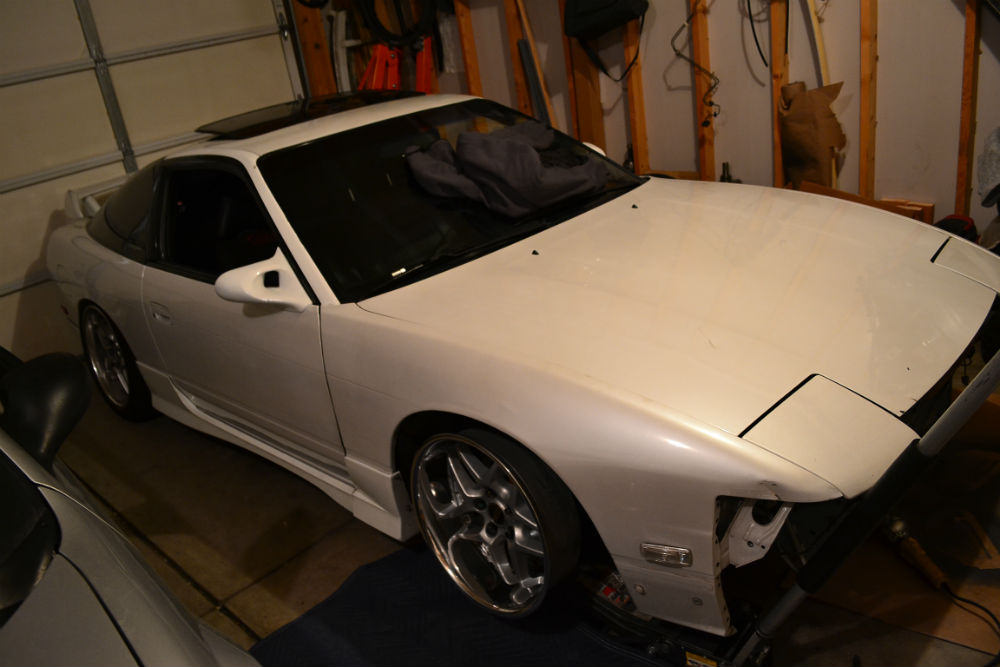
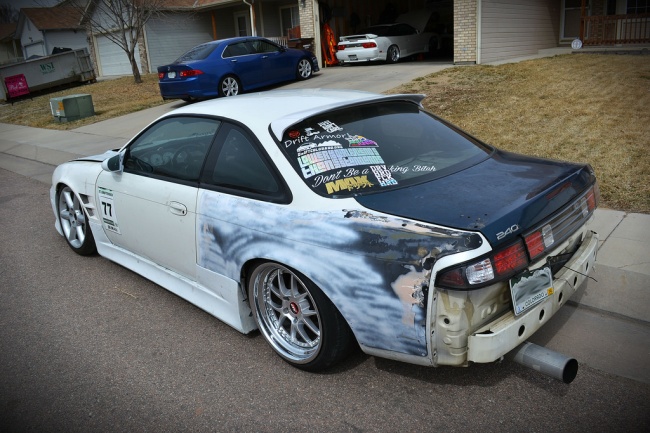
Alright, well the first drift event of the year is coming up in just 3 days. I’ve cracked down on this car quite a bit to get the car ready, but unfortunately it won’t be ready to slide. But if I can at least get it ready to look pretty on the sidelines…that will be good enough for me! 

My buddy Derrick came on by before dropping his car off at a body shop. He’s getting all body work done and a new pearl paint thrown on, should be awesome!

Image

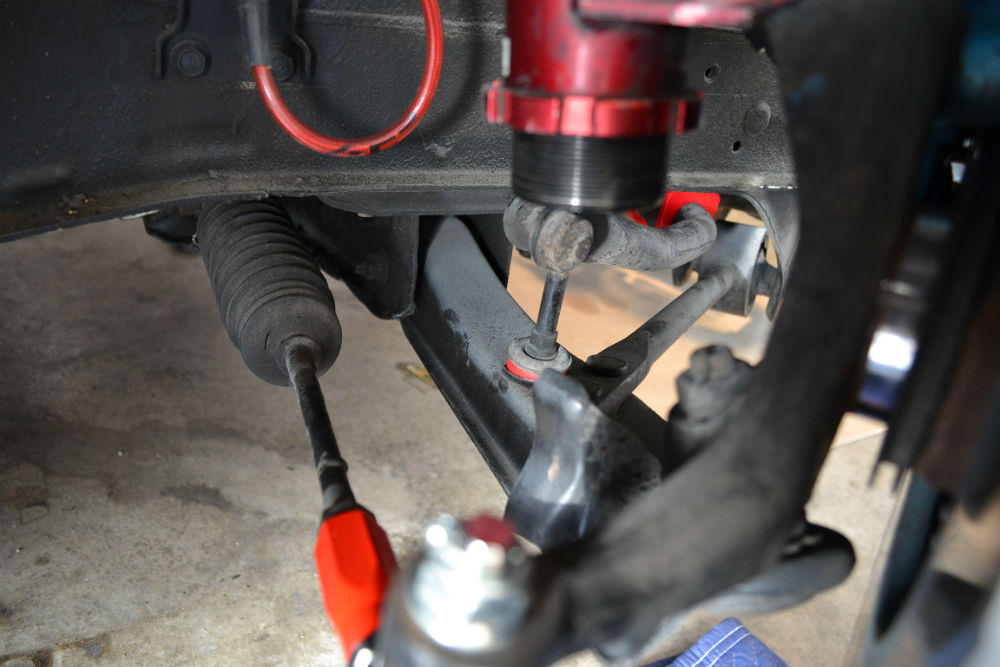
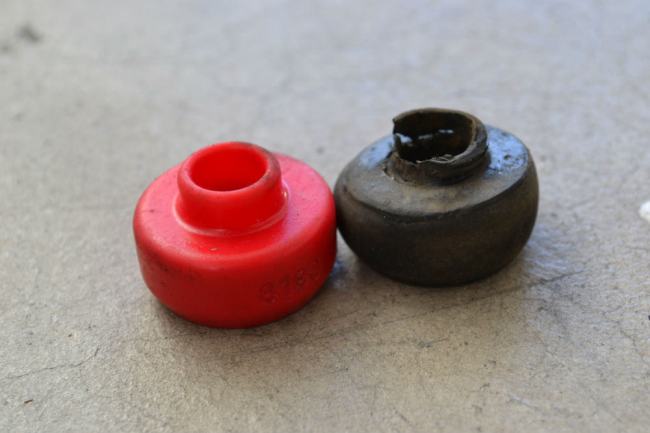
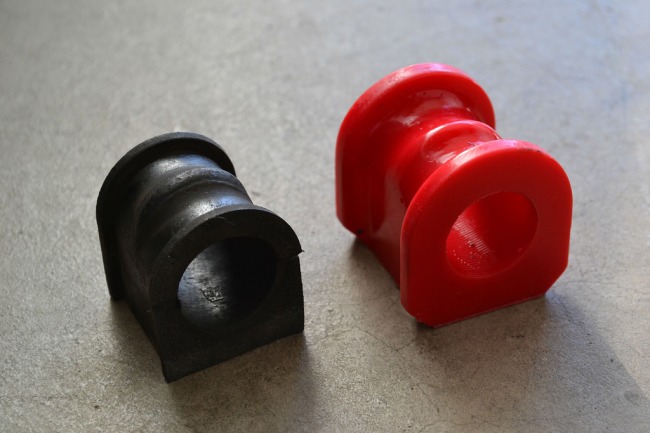
I finally got around to installing my outer tie rod ends and ES bushings. I apologize about the dirty fender wells, it’s a mixture of overspray, caked on junk etc.

Bushings – Old vs new

Image


Image

And everything installed, including the tie rod ends.

Image

Eventually I’ll get rid of those nasty stock arms..

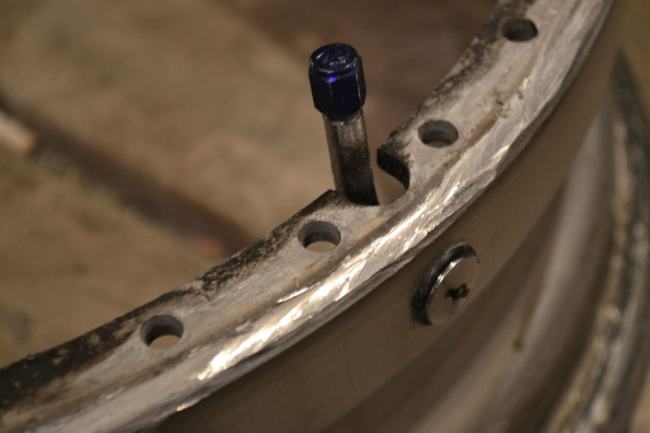
My next project was to get the BRW03’s ready before the event. This was tough, because the barrels still needed to be separated from the outer lips in order to slap the new ones on. Rather than sending them off and possibly waiting weeks, I decided to do some research and see if I could do this myself. From the help of some other 03 lovers, I got enough tips/tricks to get to it. Basically the main point to keep in mind was: Stay in the middle! I cut a little bit towards the lip just in case, I’d rather do damage to the existing crappy lips than the barrels which I need to reuse.

Here’s the outcome! This was after being separated, and I flattened the existing weld and shined it up a bit to have a clean mating surface.

Image


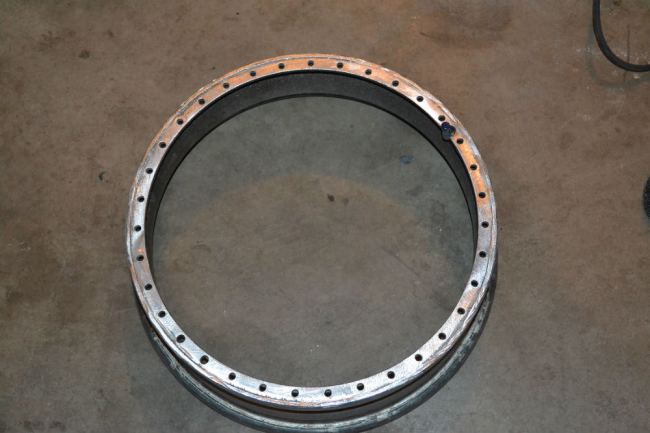
For those of you looking to do this yourself, here’s a pic of the cut weld afterwards, to give you an idea how thick it is. All I used was a 3″ cutoff tool & lots of patience.

Image


Before/after shot

Image

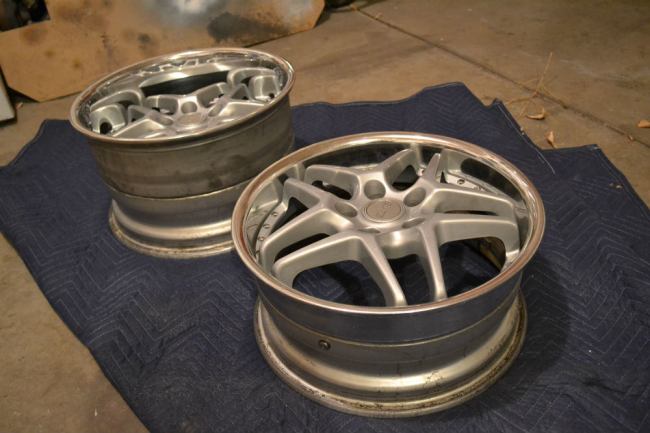
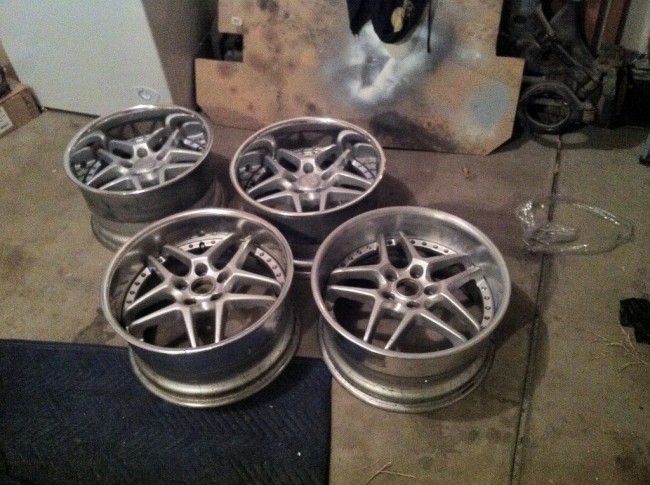
I did the same to the other front wheel as well, put them all back together, sealed them up with silicone and went to get some tires mounted. Now the rears look all crappy…haha. After some events I’ll be sending the rears along with the front faces back to Wheelflip to get polished and wider outer lips for the rears.

Image


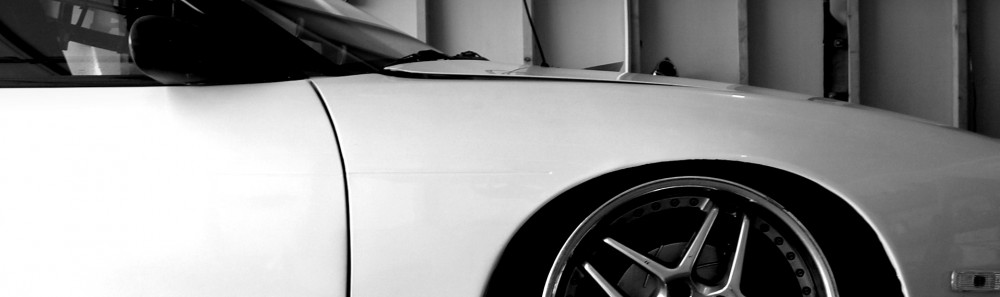
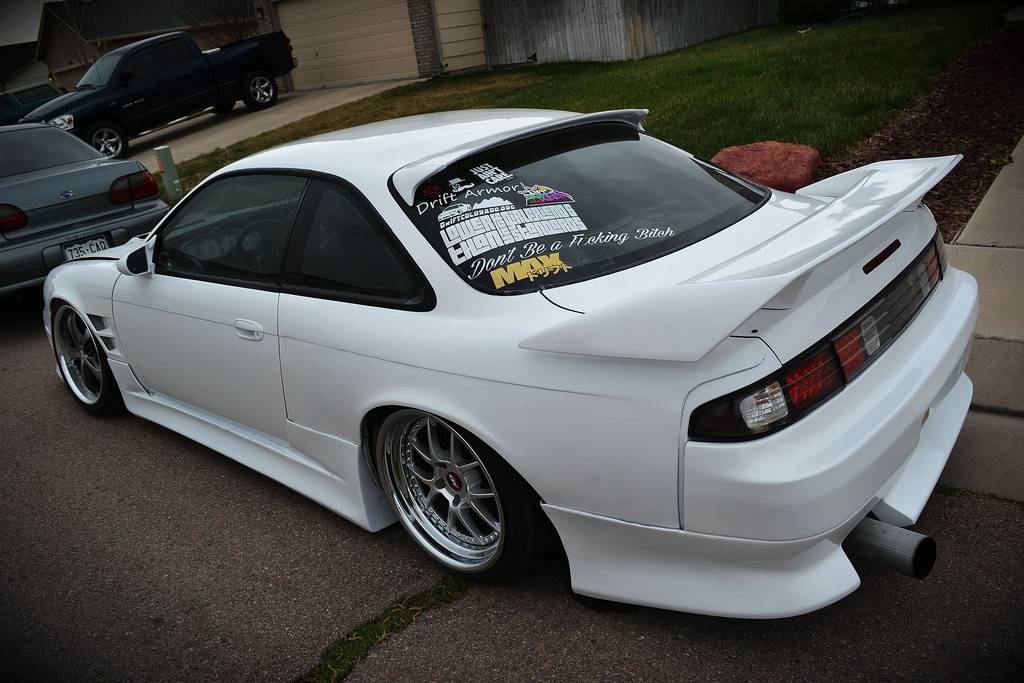
After getting them all assembled, I got the wheels on. Unfortunately since I have low disc faces, they didn’t clear my Z32 calipers so I’m running a 8mm slip-on spacer. Too bad it wasn’t enough to clear the coils, so I’m not sure what I want to do about that. Any readers have an idea? 

Here’s the outcome:

Image

Image

Image

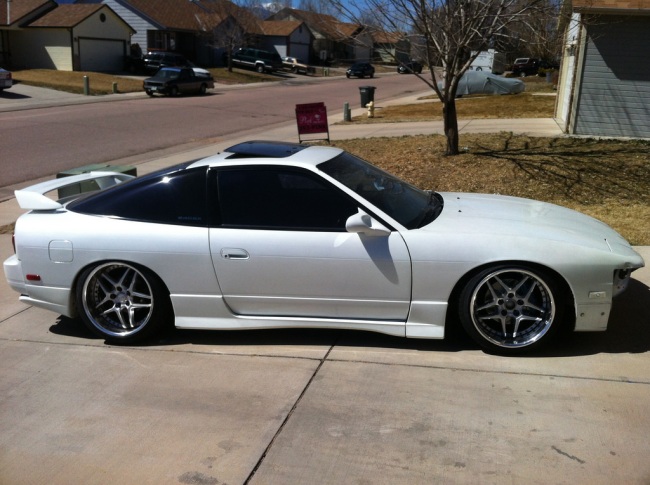
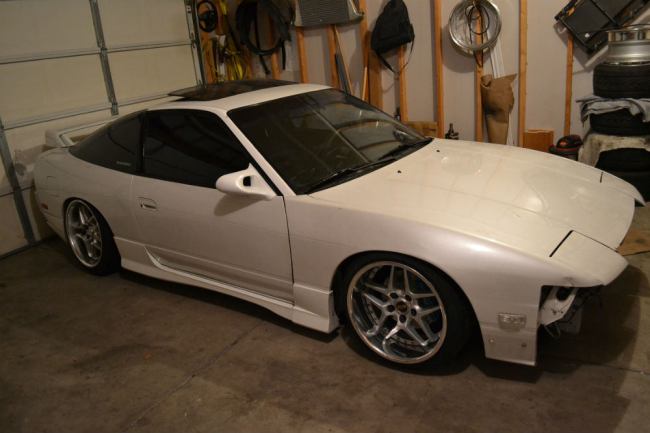
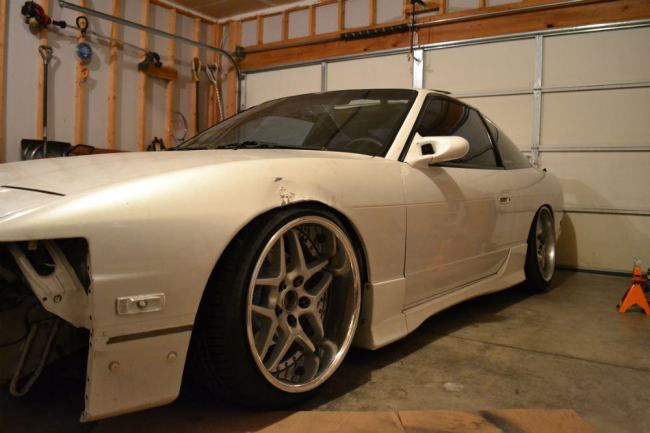
Looks pretty good! I got the wheels to sit in between the coil spring, but on a large bump that’s not going to end well..took it for a drive and here’s my next issue:

Image

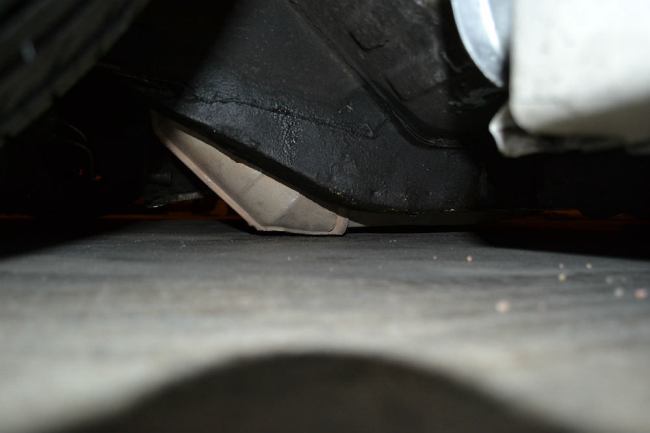
Literally no clearance! I definitely made some neighbors mad when I drove around scraping almost 100% of the ride. 

So, that’s my next issue I need to address. Only a few more days to crack down on this!

Lips lips lips!

Well, the day has finally come. Wheelflip finished my lips for the front 17″ Type 03’s! They did an amazing job and fit perfect. 

Image


I was too excited, so of course I had to do a test fit shot. Here it is:

Image

The lips are 17×5″, which match the rear 18×5″‘s. Eventually I’ll be going with 18×6″, but until then this will do! I did a few mockup shots of course, and it looks like with a small spacer (low disc unfortunately), it clears my Z brakes and fits perfect with the fender.

Image

Image

So with that done, the next step is to get my wheel faces polished and my barrels cut. I had spoken with a local polisher who’s shop is right down the street from my work, so I went there first. After being recommended to him by about 10 people on my FB, why not?

He took one look at the faces and pretty much gave me a big NOPE. He said he specializes in “simpler” design wheels, like truck wheels. He quoted me 200$ each…no thanks!

With that being said, I contacted Alex at Wheelflip again. He quoted me 90$ each. MUCH better. So, got all the faces removed and ready for shipment!

Image

I also got some suspension stuff in the other day. Nothing impressive, sorry! Just some ES bushings for the swaybar and steering rack, as well as some adjustable tie rod ends.

Image


Before the car is going back on jackstands awaiting the wheels, I had to drive it around one more time. I noticed the coolant was low, so I stopped by the gas station to fill up real quick. Little did I know…it was almost a gallon low! No wonder my car never idled right. So after filling that up and combining it with a dual core full size radiator and a clutch fan, I drove my car for about 20-30 minutes and the car never went past C. It jumped up for a second…but as soon as I started to coast down a hill it dropped again. 

Needless to say…I think it’s time I convert to some slim fans.

Image


That’s about it for now though! Wheels will be done in about 2 weeks, then it’s time for some tires and really dialing in my suspension.